If you have no idea what Lottie is, it is a library that renders Adobe After Effects animations natively on mobile and the web. To learn more, you could check out the other articles on this blog but I’d recommend starting with this.
That aside, Webflow is a website building and hosting software as a service that helps anyone with little to no prior experience build and publish a website. This article is going to explain how to implement Lottie animations on websites built on Webflow.
Get JSON File
First off, you would need a JSON file containing the After Effects animation. If you are not familiar with using After Effects, you can get free JSON files of animations from our library or anywhere else on the Internet. If you use After Effects, you would need to export the animation to a JSON format with the bodymovin extension.
Implement Animation on Webflow
After you have gotten the JSON file, in your Webflow Designer, you would need to do a couple of things:
- Create container for animation
- Drag and drop JSON file into the container
- Set the animation trigger
Create Container for Animation
Create a container where you want the animation to be. The animation is going to take up all the space in the container so you should be mindful of the width and height of the container.
Drag and Drop the JSON File into the Container
This part is quite self-explanatory. After you drop the file into the container, the first frame of the animation appears in the container and a little “settings” window appears.
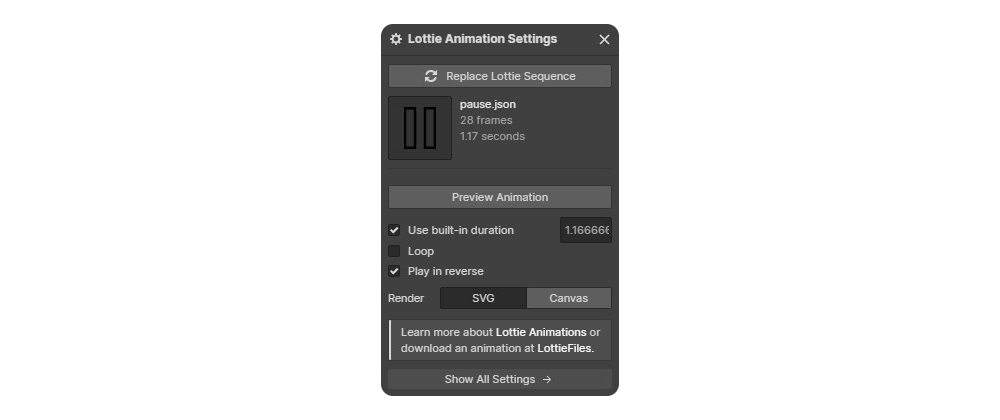
This window contains some basic settings that you can alter to modify the animation. Here, you can pick your preferred renderer, preview the animation and set a different duration for the animation.
Set the Animation Trigger
More often than not, you’d want the animation to play when the user scrolls on the page or clicks a particular element. To implement these types of triggers, you navigate to the Interaction tab on your Designer (or press H).
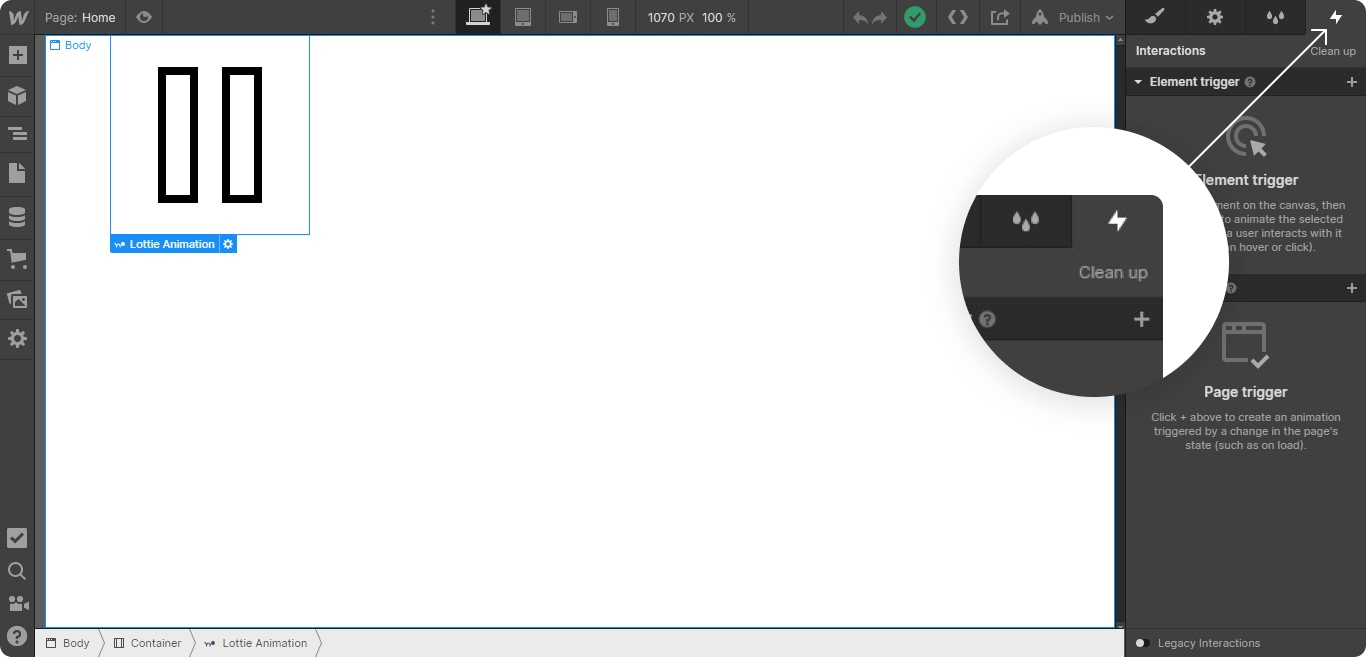
To apply triggers that would be specific to the element, you click the plus icon beside the ‘Element trigger’ text. A dropdown of options will appear and you would have to select the action that should trigger the animation. The options include the following:
- Mouse click
- Mouse hover
- Mouse move over element
- Scroll into view
- While scrolling in view
For each of these options, you can set the Lottie playback to play on the initial interaction and then play the reverse on the second interaction.
To apply triggers that will be dependent on the displayed viewport or page state, you can check out the ‘Page trigger’ options. The same steps apply to those as well. To learn more, you can check out
Webflow’s course on After Effects and Lottie.
Thank you for reading and happy animating!