Let’s start with Bodymovin plugin
Bodymovin is an After Effects extension for exporting the animation to a JSON file, which you can use on your website or in your Android or iOS app.
You can download it for free here or here, where you can show your love to the creators and pay any price you want.
After downloading Bodymovin, you’ll get bodymovin.zxp file (Adobe zip Format Extension Package file) that you can install with Adobe’s Extension Manager or use a zxp installer.
Get your design into Adobe After Effects
Your tools are ready, now let’s animate! To be as efficient as possible, it’s good to have a nicely prepared design file. You can save a lot of time by preparing the design in advance. If you don’t know how to prepare the design file, check our previous blog.
Import your Adobe Illustrator file
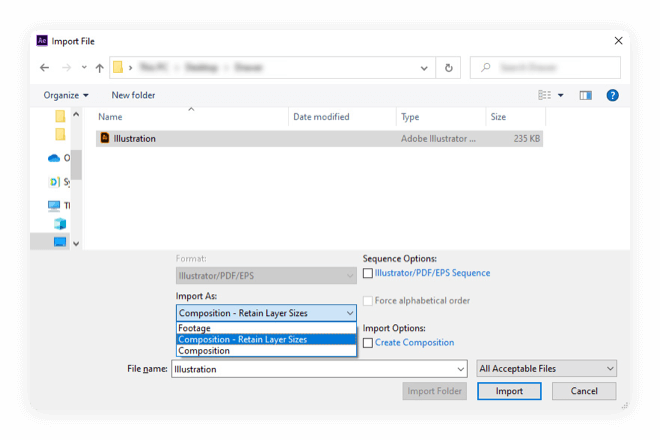
Import the design file into Adobe After Effects. Select ”File” in the top bar and choose ”Import” option. (File > Import)
When importing your organized .ai file into the Adobe After Effects, make sure the ”Import As” option is selected as ”Composition – Retain Layer Sizes”. With this option chosen Adobe After effects will import the layers exactly as they are saved in Adobe Illustrator.
Convert .ai layers to shape layers
The great thing about Lottie is that it works well with vectors, and that’s the magic why JSON files are so tiny.
Converting the layers from Illustrator file into After Effects vector shapes is fairly straightforward. Select all layers, right-click and select ”Create” and then choose ”Create shapes from Vector layer” option.
Bodymovin would export the layers as raster images without this step and increased the JSON file size.
After creating the shapes, you can delete or hide original .ai layers.

Set your composition settings
Go to ”Composition” and select ”Compositions Settings” to adjust your Width and Height, Duration of an animation, or Frame Rate. Lottie animations support up to 60 fps.
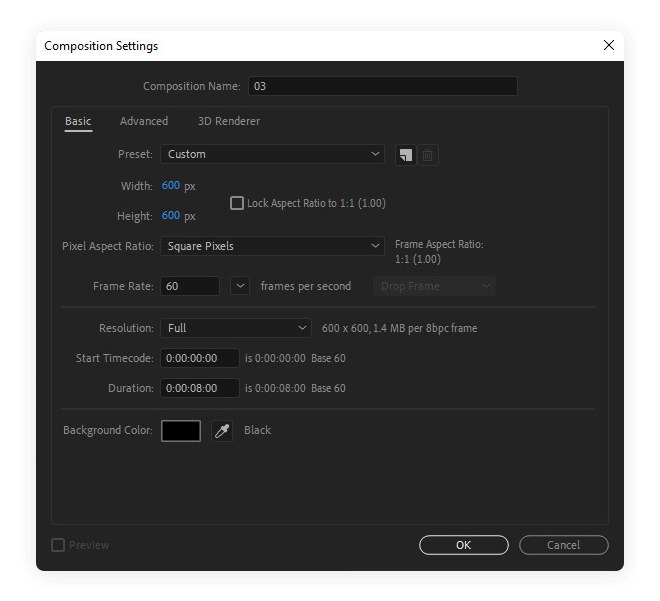
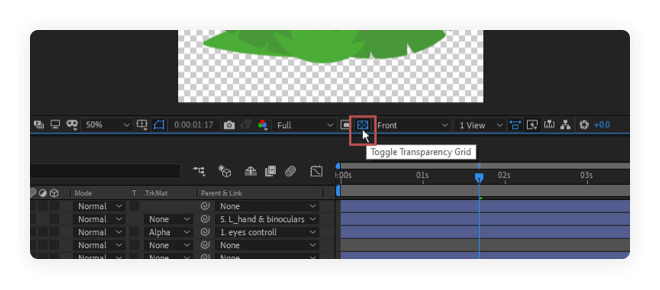
Set Background Color (black in our case) will not be rendered into your Lottie animation; the background will be transparent. To see the transparency of the document, click on the ”Toggle Transparency Grid”.
Pro tip
When you work with Ai files in Adobe After Effects more often as we do, we highly recommend the Overlord plugin; it will save your time.
With Overlord, you can send the Illustrator layers into the Adobe After Effects with one click. It will import Adobe After Effects shape layers and preserve layer names and position. Overlord can further export guides, color palettes, gradients & editable text layers as well.
Create animation
When it comes to animating itself, try to use only basic features – scale, position, rotation, opacity, or animate paths. If you want to use some advanced Features, always check Supported After Effects Features first.
We advise you not to use raster files (it affects the file size) and any effects from the Effects panel; most of them are not supported by Lottie.
Export the JSON file
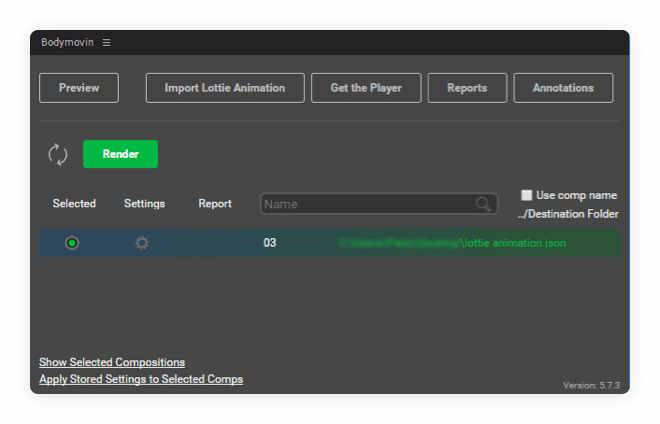
Once you have created your animation and are satisfied with the result, navigate to ”Window”, select ”Extensions”, and choose ”Bodymovin” option. (Window > Extensions > Bodymovin)
Now select a composition or multiple compositions that you want to render.
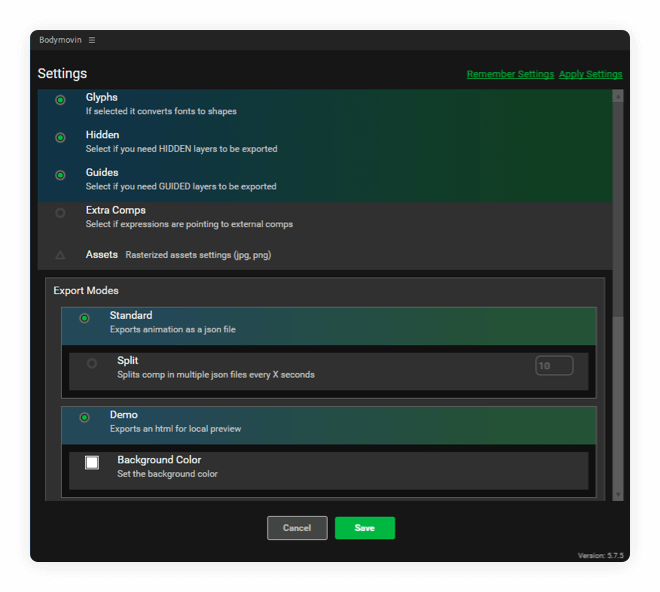
When you go to the ”Settings” in the Bodymovin dialog, you can see a few different options you can choose from. Each option is well explained, but you might not know what GUIDED layers are. Plugins create those layers for rigging characters like Duik or RubberHose, so if you are using such a plugin, make sure to select the option.
If you like to see your Lottie animation implemented in the HTML file, you can quickly test if the animation works as designed and select ”Demo” in the ”Export Modes” section. Another option to test your animation is using our Lottie Preview, where you can drag and drop your JSON file.
Save the settings and hit ”Render”.
Final animation
That’s it! Your Lottie animation is ready to be implemented on your website or in your app to improve the experience and delight your users.
Looking for ready to use animations?
Not every company has the assets to hire an animator to create custom Lottie animations. In this case, we are providing an out-of-the-box solution in the form of ready to use animations. Check out our library of pre-made animations.